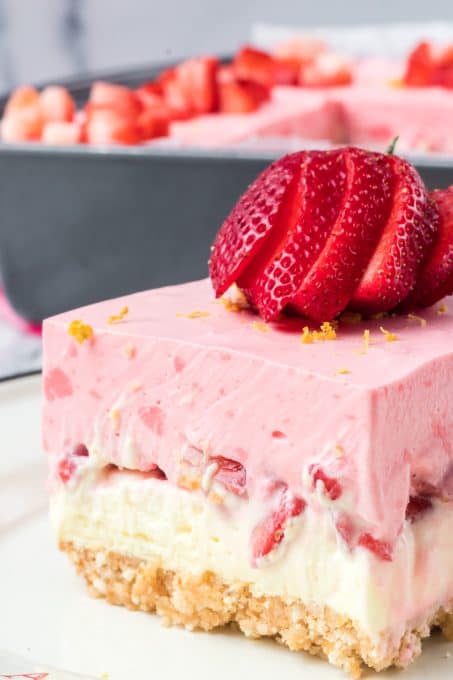
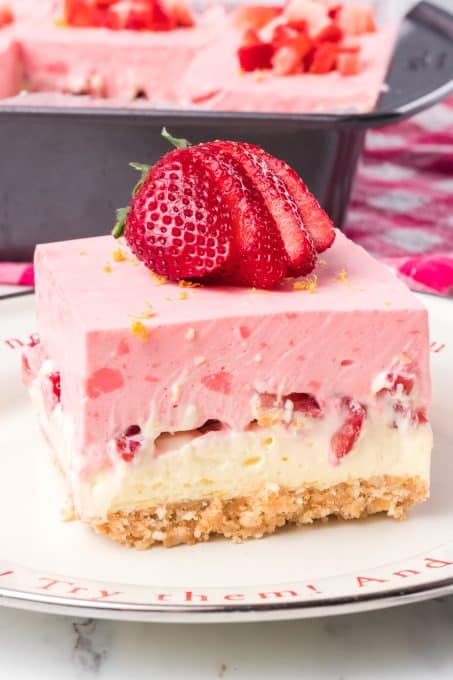
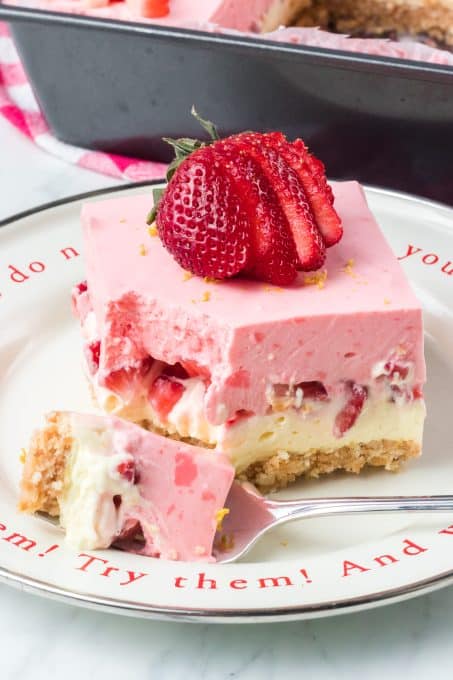
It’s the perfect time of year to enjoy a cool, no-bake dessert with these fruity Strawberry Lemonade Dream Bars! With sweet strawberries and fresh lemon juice, all the flavors of your favorite beverage can be found in these creamy dessert bars! A smooth strawberry cream is layered over no-bake lemon cheesecake filling, all on a crunchy Nilla wafer crust. One bite and your taste buds will be singing!
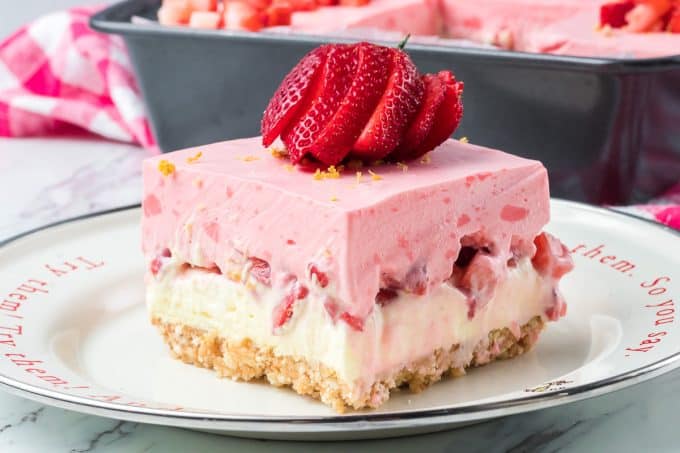
This Dream Bar recipe, like many of my others, is perfect for summer parties or dessert after a special event. While it takes a bit of time to prepare these strawberry lemonade bars, I promise that the end result is well worth the effort!
SAVE THIS RECIPE FOR STRAWBERRY LEMONADE LUSH BARS TO YOUR FAVORITE PINTEREST BOARD!
Recipe Notes
- Use the amounts of water in this recipe required to mix the strawberry gelatin. DO NOT use the amounts listed in the box instructions. We want a more stable gelatin and less of it.
- If the strawberry cream mixture is left in the refrigerator for more than one hour, the gelatin will harden and form. This isn’t an issue unless you want a completely creamy layer for the top with NO strawberry or red gelatin specks.
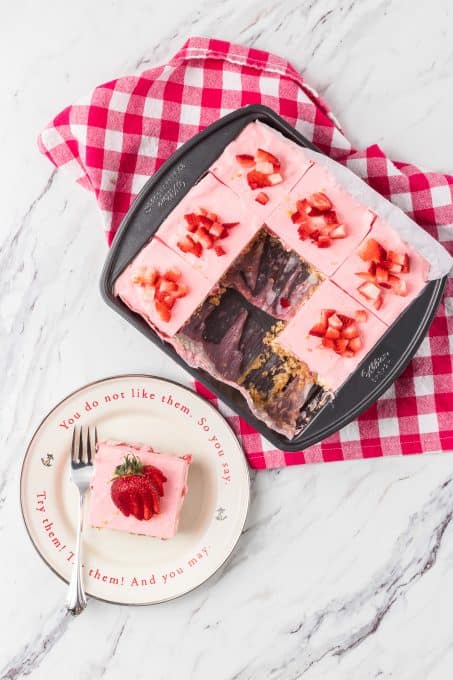
- Images in this post depict a halved recipe made in an 8 x8-inch baking pan, so the cheesecake and strawberry cream layers will be thinner when made in a 9 X 13-inch pan.
- Know that if you divide this recipe in half to make in an 8 X 8 or 9 X 9-inch pan that there may be some leftover Strawberry Cream Layer. But that’s ok! It’s delicious eaten on it’s own with a bit of whipped cream.
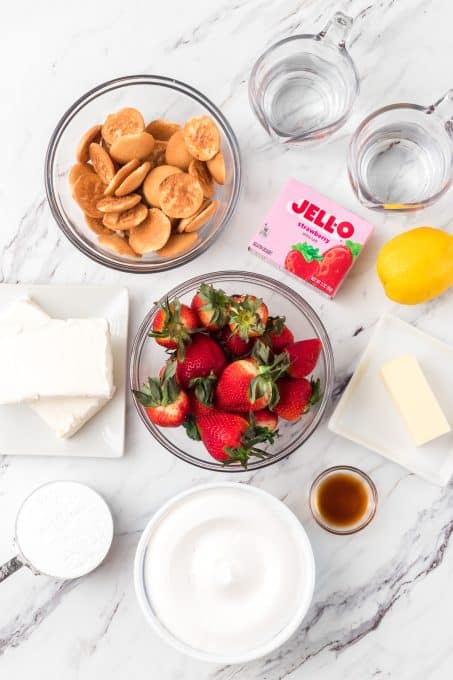
Ingredients for Strawberry Lemonade Dream Bars
Here’s what you need to make these creamy strawberry lemon bars:
Nilla Wafer Crust
- Nilla Wafer Cookie Crumbs (about 90 cookies worth)
- Salted or Unsalted butter – either is fine
Strawberry Cream Layer
- Strawberry JELL-O: you need 7 ounces so one large package or two smaller packages will work.
- Boiling water
- Cold water
- Cream cheese (room temperature)
- Cool Whip
Cheesecake Layer
- Cream cheese (yes, you need this for both layers!)
- Powdered sugar
- Fresh lemon juice
- Fresh lemon zest
- Cool Whip
Additional Ingredients
- Fresh strawberries, hulled and sliced
- More Cool Whip (or use my Stabilized Whipped Cream Recipe)
Review the recipe card below for the exact amounts needed for each ingredient!
How to Make Strawberry Lemonade Dessert Bars
Let’s make these Strawberry Dream Bars one layer at a time. We’ll start with the buttery shortbread-style crust!
Nilla Wafer Crust
- Prepare a 9 X 13-inch baking pan by spraying it with cooking spray.
- In a medium bowl, melt butter in a microwave for about 30 seconds. Stir and melt for another 5-10 seconds, if necessary.
- In a food processor, pulse the Nilla Wafers until they are fine crumbs. Add the cookie crumbs to the melted butter and mix with a rubber spatula until all are well incorporated. If you don’t have a food processor, you could use a blender, or do it by hand with a pastry blender.
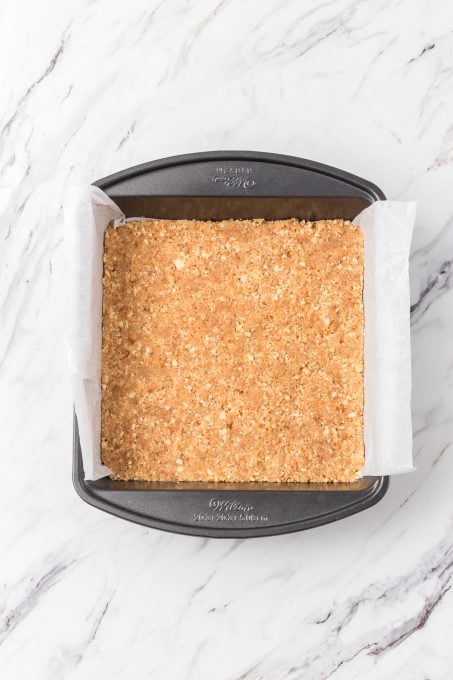
- Pour the crumb mixture into the prepared pan and spread, pressing down to create an even crust. Place the pan into the freezer while preparing the rest of the recipe for a minimum of 30 minutes.
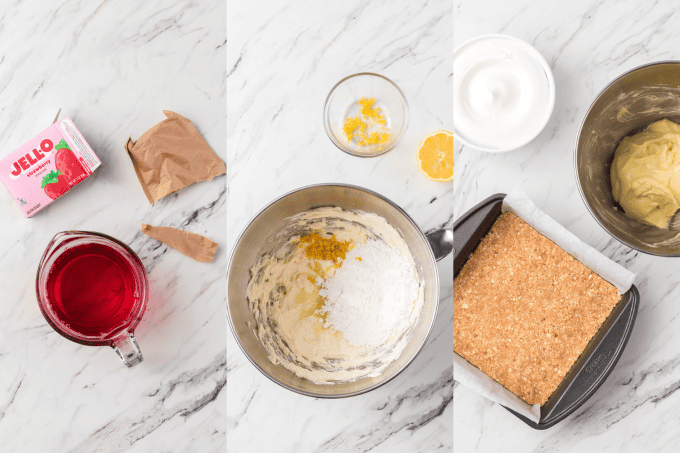
Strawberry Gelatin
- In a large bowl, mix the strawberry gelatin with 1 1/2 cups boiling water. Stir until dissolved. Add the 1 1/2 cups cold water and stir. Place into refrigerator until completely cooled, but not set – about 10 minutes.
Strawberry Cream Layer
- In a mixing bowl, beat 16 ounces of the cream cheese until smooth.
- Using a ladle, slowly add in the chilled gelatin mix while mixing everything together. This could take 8-10 minutes depending on how slowly you add it and how well incorporated you want it. The more slowly you pour in the gelatin, the smoother the mixture will be without any lumps of cream cheese. Once it is completely smooth, place the bowl into the refrigerator to chill and thicken for one hour.
Lemon Cheesecake Layer
- In the bowl of a stand mixer fitted with the paddle attachment, beat another 12 ounces of cream cheese, the confectioners’ sugar, lemon juice, and lemon zest together until smooth and creamy. With a rubber spatula, fold in 1 1/2 cups of the Cool Whip to the lemon mixture.
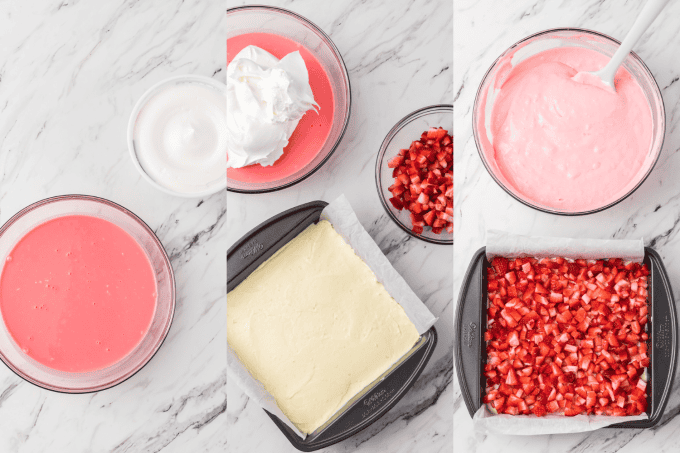
- Place dollops of the cream cheese mixture onto the frozen crust and with an offset spatula, spread to form an even layer.
- Scatter the diced strawberries evenly over the top of the cheesecake layer.
Assembly
- After the Strawberry Cream mixture has been refrigerated for an hour, fold in 4 cups of the Cool Whip with a rubber spatula until evenly distributed and smooth.
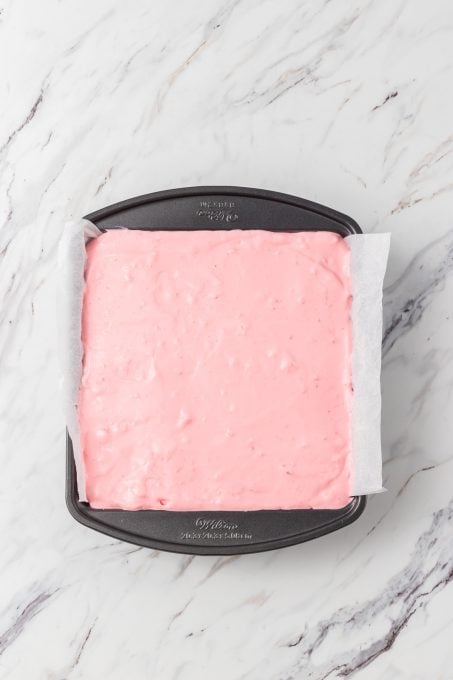
- Gently pour the strawberry cream over the strawberries and cheesecake layer and spread evenly with an offset spatula.
- Place into the refrigerator for a minimum of 6 hours, but it’s best if refrigerated overnight.
How to serve Strawberry Lemonade Dream Bars
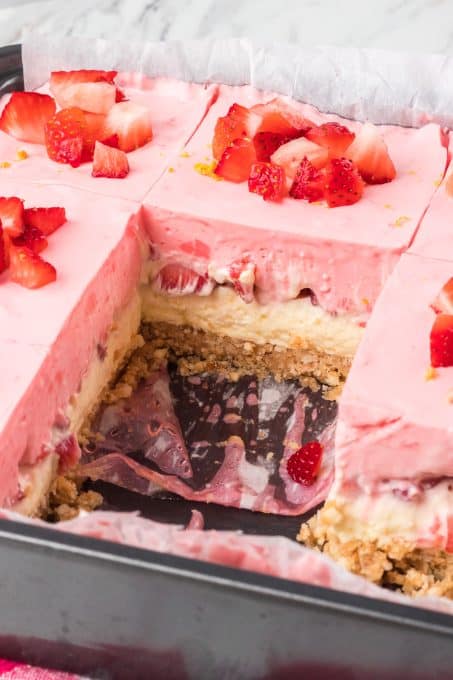
When slicing, run a large knife under hot water, dry it off, and then slice through the bars, repeating with each cut. This will help make clean cuts.
Serve with dollops of additional Cool Whip or my Stabilized Whipped Cream, fresh strawberries, and lemon zest.
How to store Dream Bars
Keep these bars tightly covered in an airtight container in the fridge for another 2 days. Serve leftovers directly from the fridge!
More Dream Bars to Try
If you love easy recipes like these no-bake desserts, you’ll love the rest of my Dream Bar recipes.
There’s a flavor for everyone!
- Peanut Butter and chocolate are always a delicious combination, so try my Chocolate Peanut Butter Dream Bars.
- Like chocolate, caramel, and pecans? Then these Easy No Bake Turtle Dream Bars will remind you of those candies everyone loves so much.
You can also choose to go with a fruit-flavored one.
- I’ve got these sweet Strawberry Cheesecake Dream Bars, and this one made with chocolate AND strawberries.
- Banana lovers will enjoy this one too!
More of the Season’s Most Iconic Desserts
- Try this Classic Lemon Bar recipe!
- You’ll love this Strawberry Shortcake Recipe too. Anything made with fruity strawberries is perfect for spring!
- I love recipes made with Lemon Curd, like the layers of lemon in these Lemon Dream Bars, or this Lemon Poke Cake.
~ FOLLOW ME ~
~ FACEBOOK ~ PINTEREST ~
~ INSTAGRAM ~ TWITTER ~
~ YOUTUBE ~
Keep an eye out for more of my easy recipes each week!
Strawberry Lemonade Dream Bars
Ingredients
- 16 ounces Cool Whip (2) 8 oz. tubs, divided or 2 recipes of my Stabilized Whipped Cream, divided
- 16 ounces strawberries washed, hulled and diced small. Plus additional for serving, if desired.
Nilla Wafer Crust
- 3 cups Nilla Wafer Cookie Crumbs about 90 cookies
- 10 tablespoons butter
Strawberry Cream Layer
- 7 ounces package strawberry jello (2) 3.5 ounce packages
- 1 ½ cups boiling water
- 1 ½ cups cold water
- 16 ounces cream cheese room temperature
- 4 cups Cool Whip
Cheesecake Layer
- 12 ounces cream cheese room temperature
- 1 ½ cups powdered sugar
- 3 tablespoons fresh squeezed lemon juice
- 1 tablespoon fresh lemon zest plus some set aside for garnish, if desired
- 1 ½ cups Cool Whip
- remaining ½ cup Cool Whip, Stabilized Whipped Cream or canned whipped cream for serving if desired
- additional strawberries for serving if desired
Instructions
Nilla Wafer Crust
- Prepare a 9 X 13-inch baking pan by spraying it lightly with cooking spray.
- In a medium bowl, melt the 10 tablespoons of butter in a microwave for about 30 seconds. Stir and melt for another 5-10 seconds, if necessary.
- In a food processor, pulse the Nilla Wafers until they are fine crumbs. Add the cookie crumbs to the melted butter and mix with a rubber spatula until all is well incorporated.
- Pour into the prepared baking dish and spread, pressing down to create an even crust. Place pan into the freezer while preparing the rest of the recipe for a minimum of 30 minutes.
Strawberry Gelatin
- Into a large bowl, mix the strawberry gelatin with 1 1/2 cups boiling water. Stir until dissolved. Add the 1 1/2 cups cold water and stir. Place into refrigerator until completely cooled, but not set – about 10 minutes.
Strawberry Cream Layer
- In a mixing bowl, beat 16 ounces of the cream cheese until smooth.
- Using a ladle, slowly add in the chilled gelatin mix while mixing everything together. This could take 8-10 minutes depending on how slowly you add it and how well incorporated you want it. The more slowly you pour in the gelatin, the smoother the mixture will be without any lumps of cream cheese. Once completely smooth, place into refrigerator to chill and thicken for one hour. *See Note.
Lemon Cheesecake Layer
- In another large mixing bowl, beat another 12 ounces of cream cheese, the confectioners' sugar, lemon juice, and lemon zest together until smooth and creamy. With a rubber spatula, fold in 1 1/2 cups of the Cool Whip.
- Place dollops of cheesecake mixture onto the frozen crust and with an offset spatula, spread to form an even layer.
Fresh Strawberries
- Scatter the diced strawberries evenly over the top of the cheesecake layer.
Strawberry Cream Layer – continued
- After the Strawberry Cream mixture has been refrigerated for an hour, fold in 4 cups of the Cool Whip with a rubber spatula, combining until evenly distributed and smooth.
- Gently pour the strawberry cream over the strawberries and cheesecake layer and spread evenly with an offset spatula.
- Place into the refrigerator for a minimum of 6 hours, but best if refrigerated overnight.
- When slicing, run a large knife under hot water, dry off, and then slice through the bars, repeating with each cut. This will help make clean cuts.
- Serve with dollops of additional Cool Whip or my Stabilized Whipped Cream, fresh strawberries, and lemon zest.
Notes
- Use the amounts of water in this recipe required to mix the strawberry gelatin. DO NOT use the amounts listed in the box instructions. We want a more stable gelatin and less of it.
- If strawberry cream mixture is left in the refrigerator for more than one hour, the gelatin will harden and form. This isn’t an issue unless you want a completely creamy layer for the top with NO raspberry or red gelatin specks.
- Images in post depict half of the recipe, so the cheesecake and strawberry cream layers may be thinner when made in a 9 X 13-inch pan.
- Know that if you divide this recipe in half to make in an 8 X 8 or 9 X 9-inch pan that there may be some of the Strawberry Cream Layer that won’t fit. But that’s ok! It’s delicious eaten on it’s own with a bit of whipped cream.

Comments & Reviews
I’m trying to pin to Pinterest and it’s broken. Would you mind checking the link?
Lynda, that is quite perplexing as after reading your comment, I tried all of the “Pin Recipe” buttons – top of the post, both the top AND bottom buttons in the recipe card, as well as the pin button below my newsletter sign up and they all work for me.
Could you try a different browser, like if you’re using Safari try Google or Bing or vice versa, and then let me know if that works, please?
Also, if you’re trying to pin it from the section where it says, “save this to your favorite Pinterest board” that link will just take you to my Pinterest account where you can follow me, but you won’t be able to pin it directly there if that’s the issue you’re having.
If I choose stabilized whipped cream – do I use the same amount as you have given for Cool Whip
Bobette, you can definitely use the Stabilized Whipped Cream for this recipe. You’ll need to double it as one recipe makes about as much whipped cream as one 8 ounce tub of Cool Whip, and these Strawberry Lemonade Dream Bars require 2 of them. Enjoy, and I’d love to know what you think of them, so please let us know!