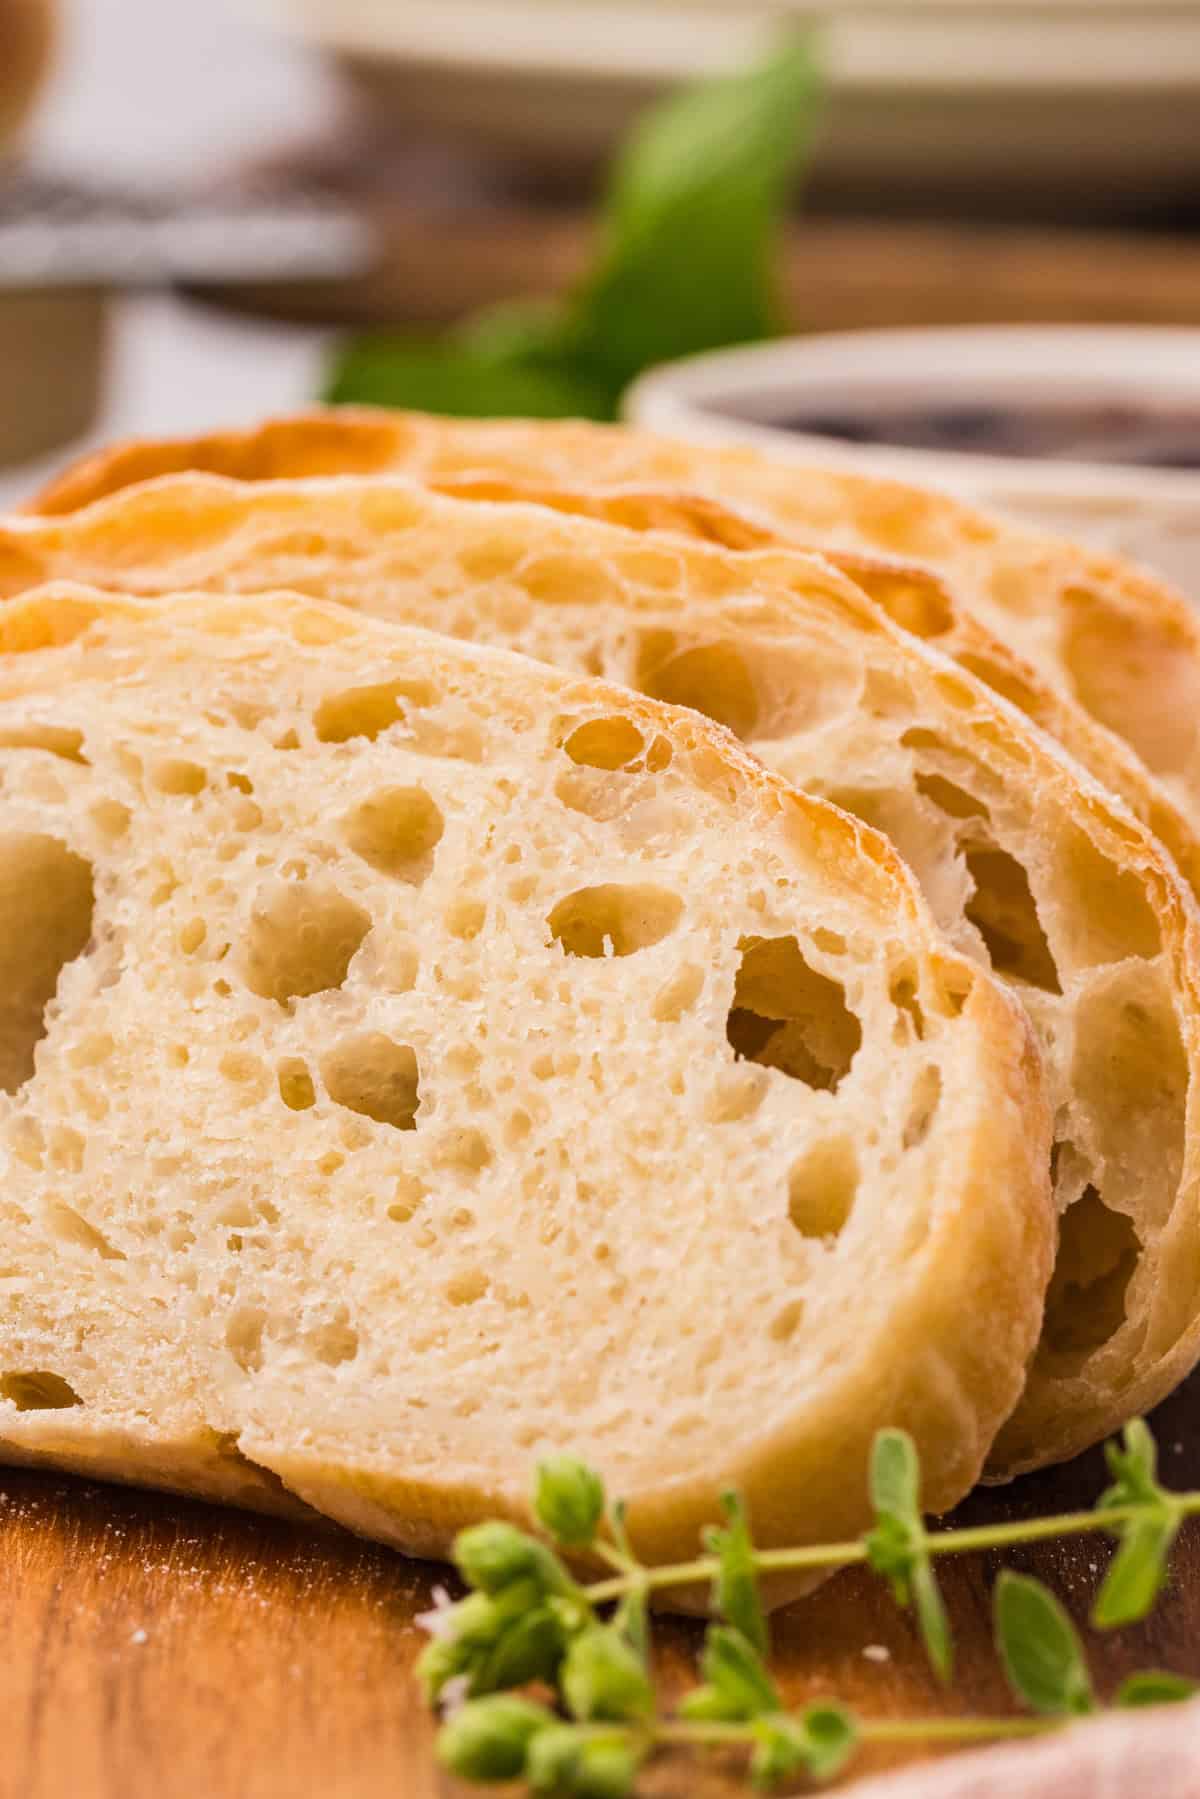
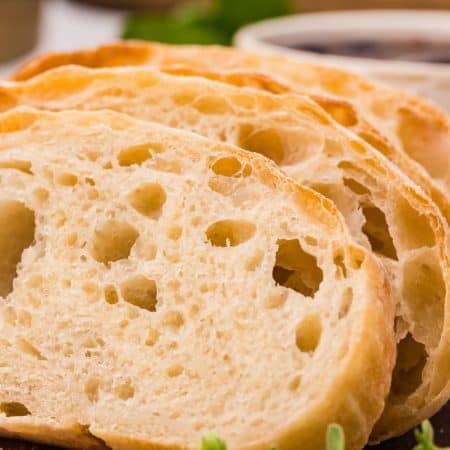
This Ciabatta Bread Recipe is an Italian classic. Its crisp golden crust and light airy texture make it perfect for sandwiches, dipping in olive oil, or enjoying on its own. Whether fresh from the oven or toasted, it’s a bakery-quality bread that’s both simple and irresistible!
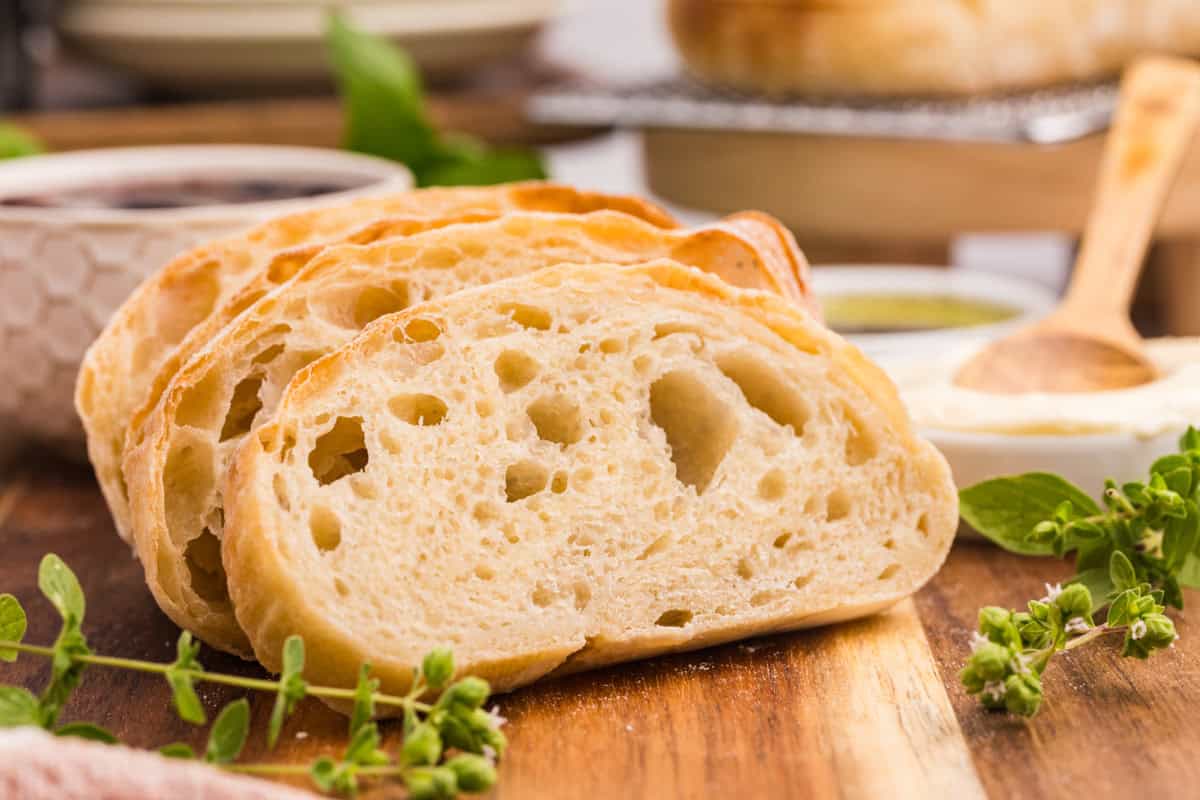
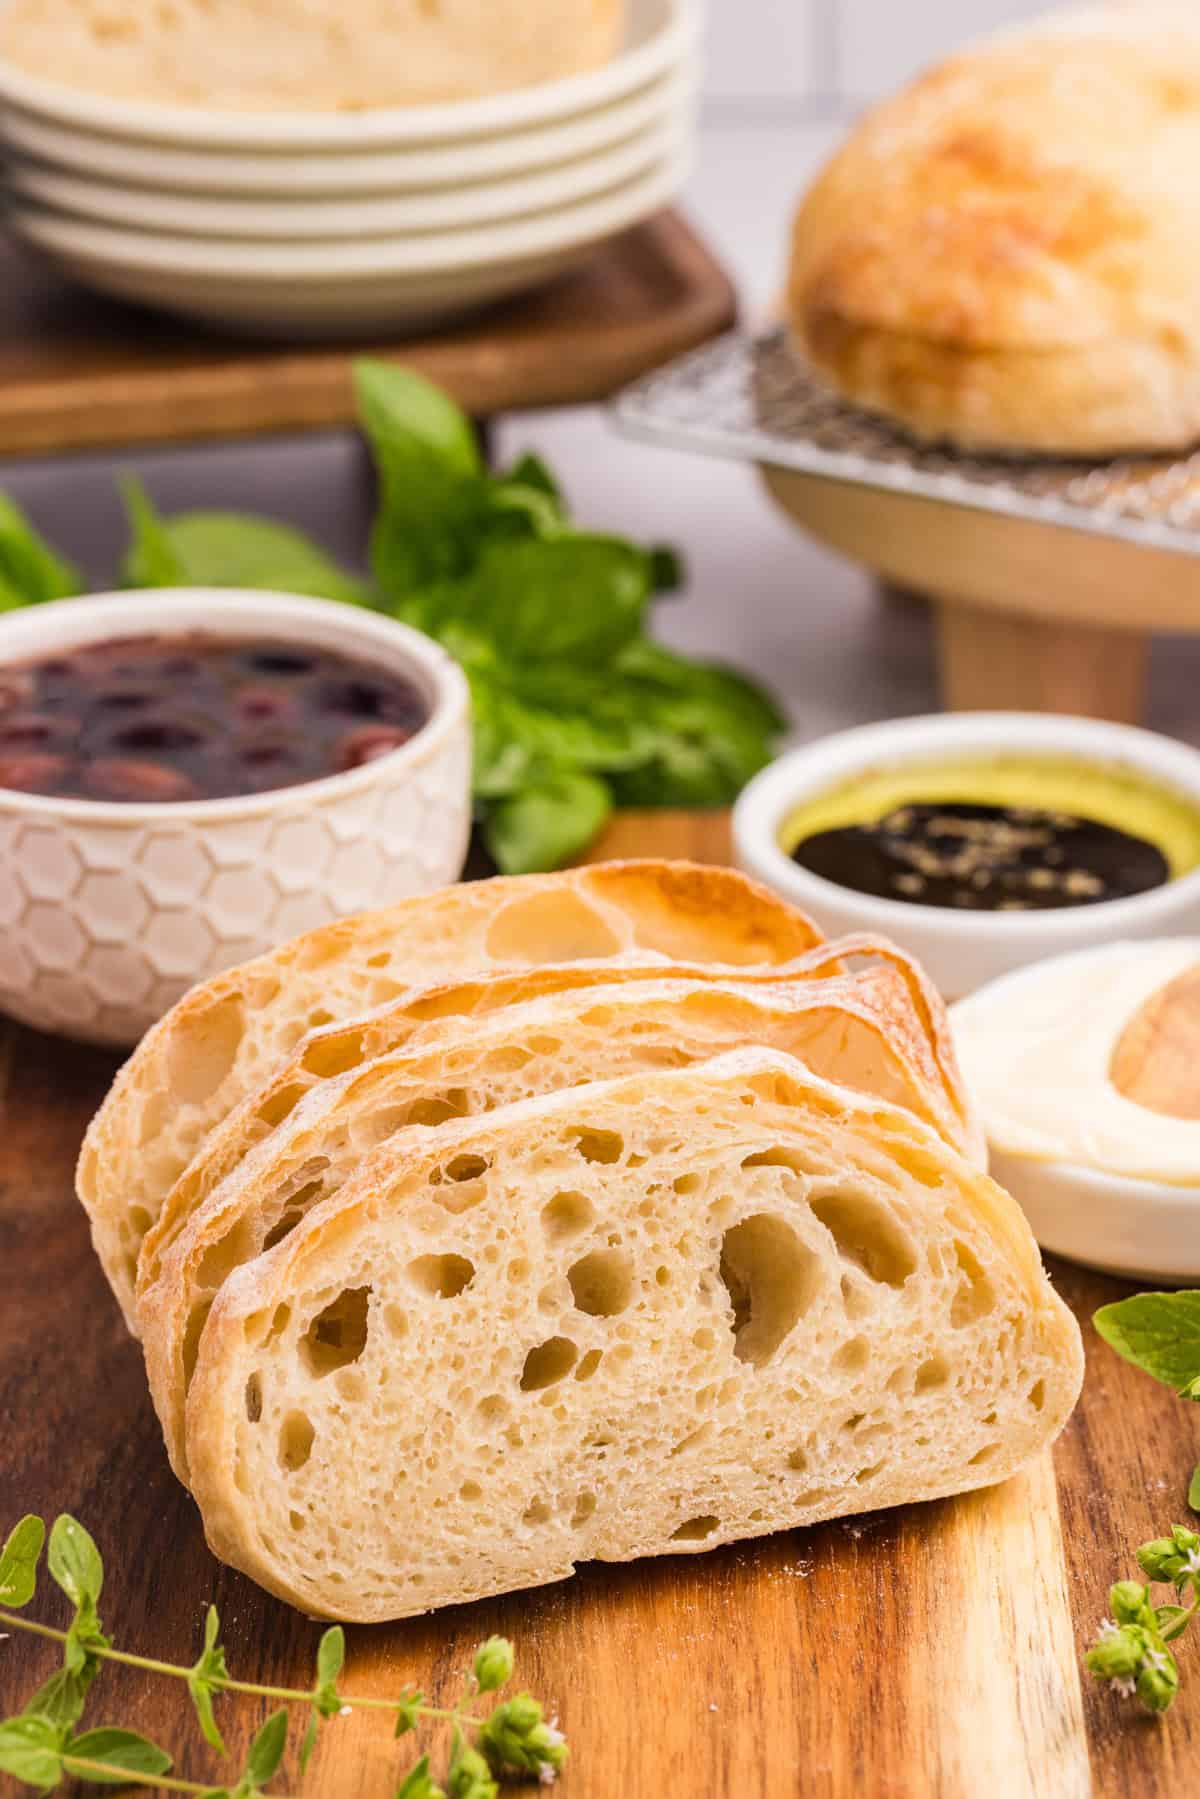
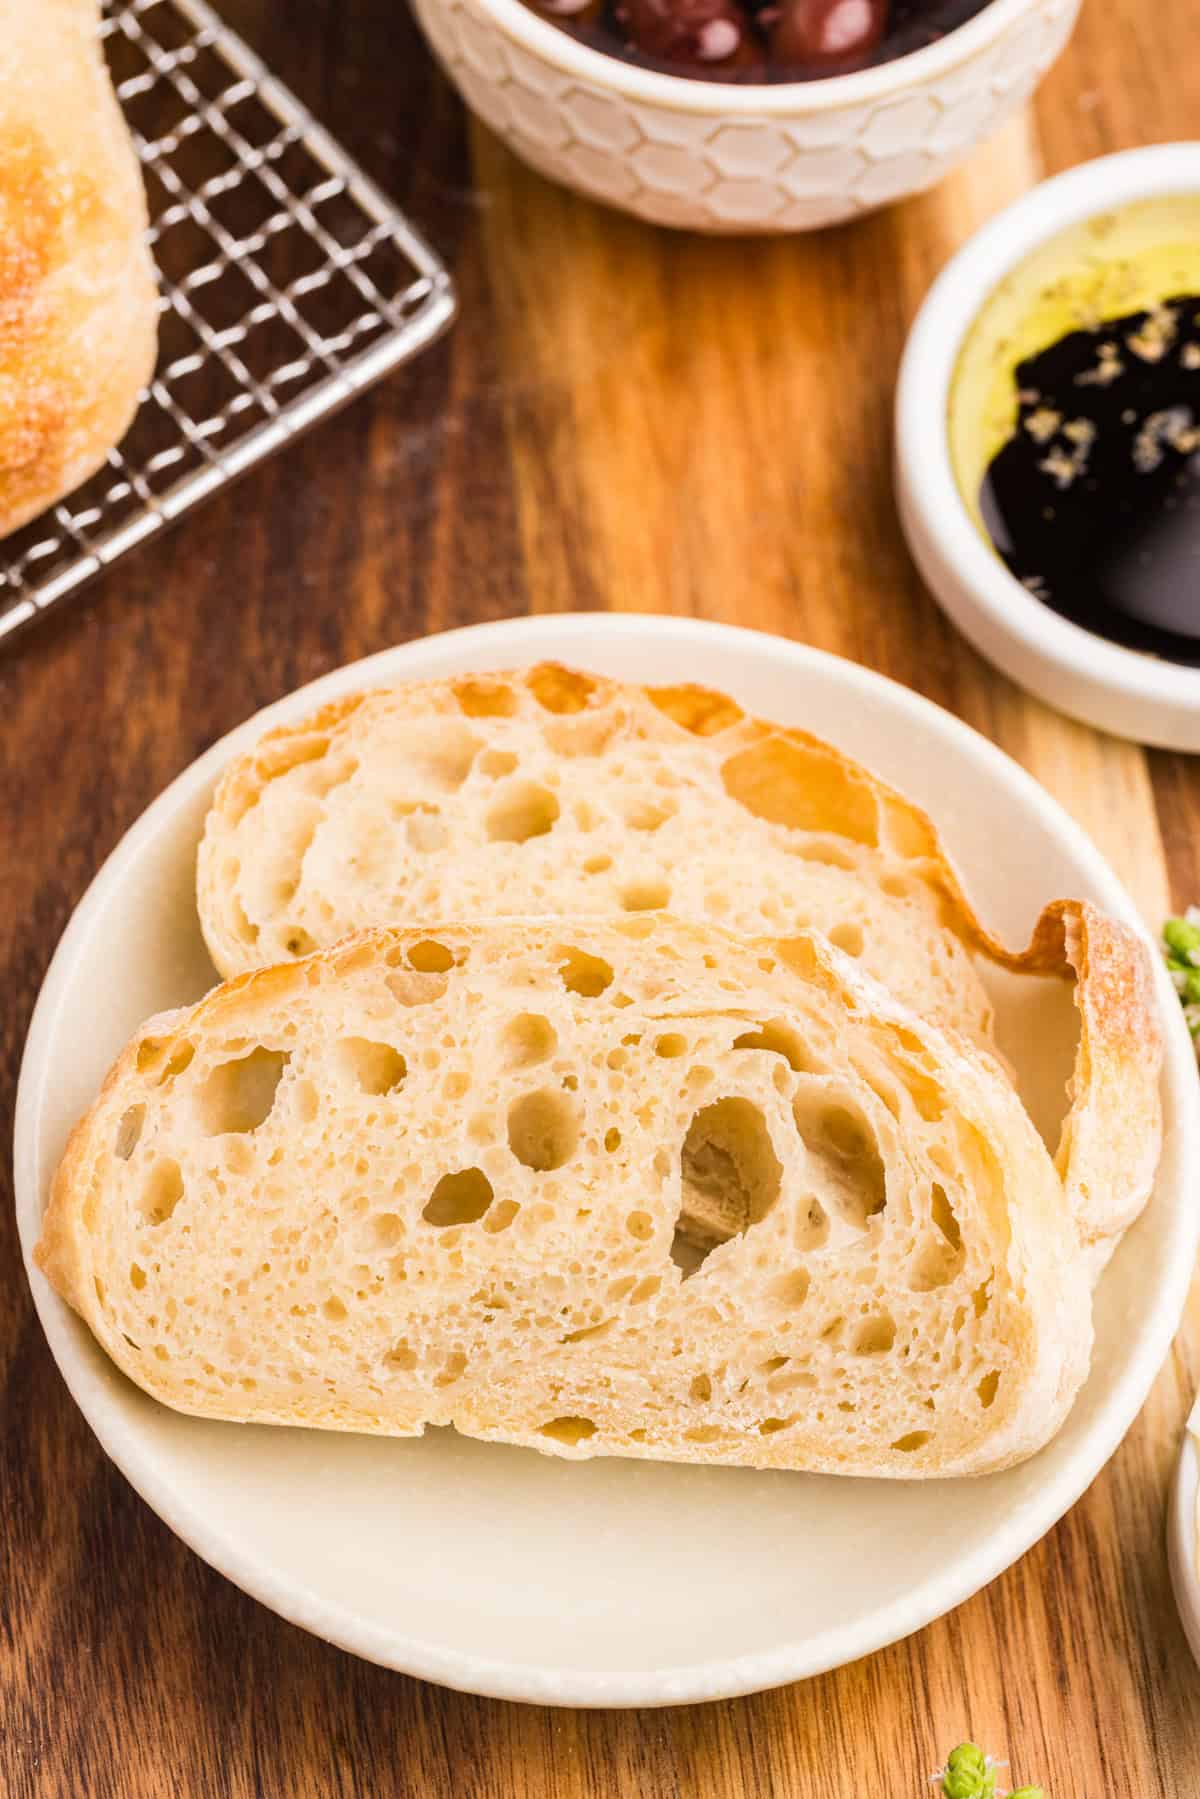
Ciabatta bread is rustic, airy, and delightfully chewy! It is fluffy on the inside and crusty on the outside with the perfect amount of substance to it. It’s a great vehicle for dipping, or tastes great on its own with a pat of butter.
SAVE THIS EASY CIABATTA BREAD RECIPE TO YOUR FAVORITE PINTEREST BOARD!
Make the Best Ciabatta Bread
This is a very wet dough that can be hard to handle. Make sure you have wet hands when working the dough.
For best results, measure the ingredients with a digital scale.
There are a lot of steps to this recipe, which may seem intimidating. I’ve done all the testing and hard work for you to make sure this recipe turns out perfectly, so if you follow the instructions, you’ll have delicious ciabatta bread too! I’ll throw in some notes along the way to help you in your baking process.
Ingredients for Ciabatta Bread
The best thing about this bread is that it uses only a handful of simple ingredients. Nothing fancy, just good old pantry staples that come together to form a perfect rustic loaf! Here’s what you need:
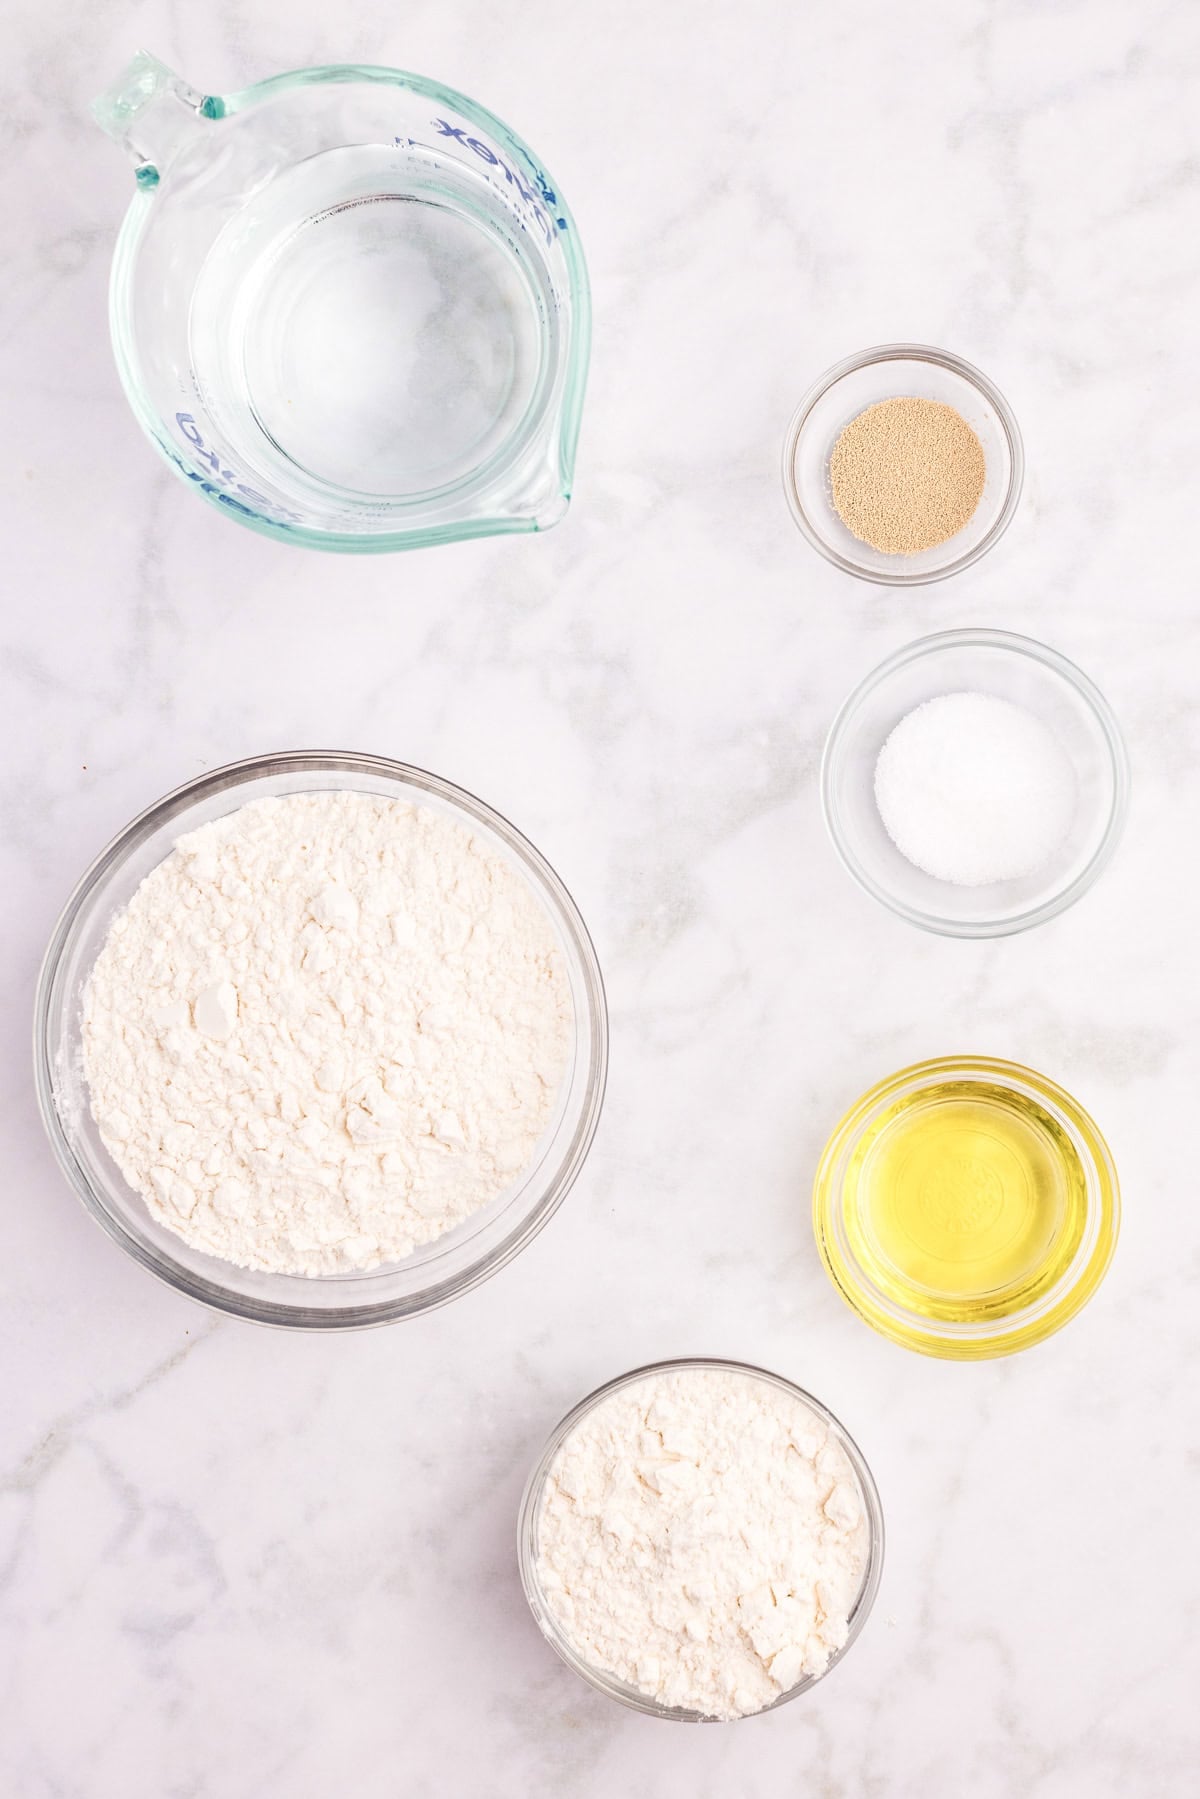
- All-purpose flour
- Active dry yeast
- Bread flour
- Sea salt
- Olive oil
- Warm water- for rising
- Ice- for shaping and baking
For a detailed list of ingredients, see the printable recipe card at the bottom of the post!
How to Make Ciabatta Bread
Let’s start by making a sponge, or yeast starter. Do this the evening before you plan to bake the bread.
For the sponge
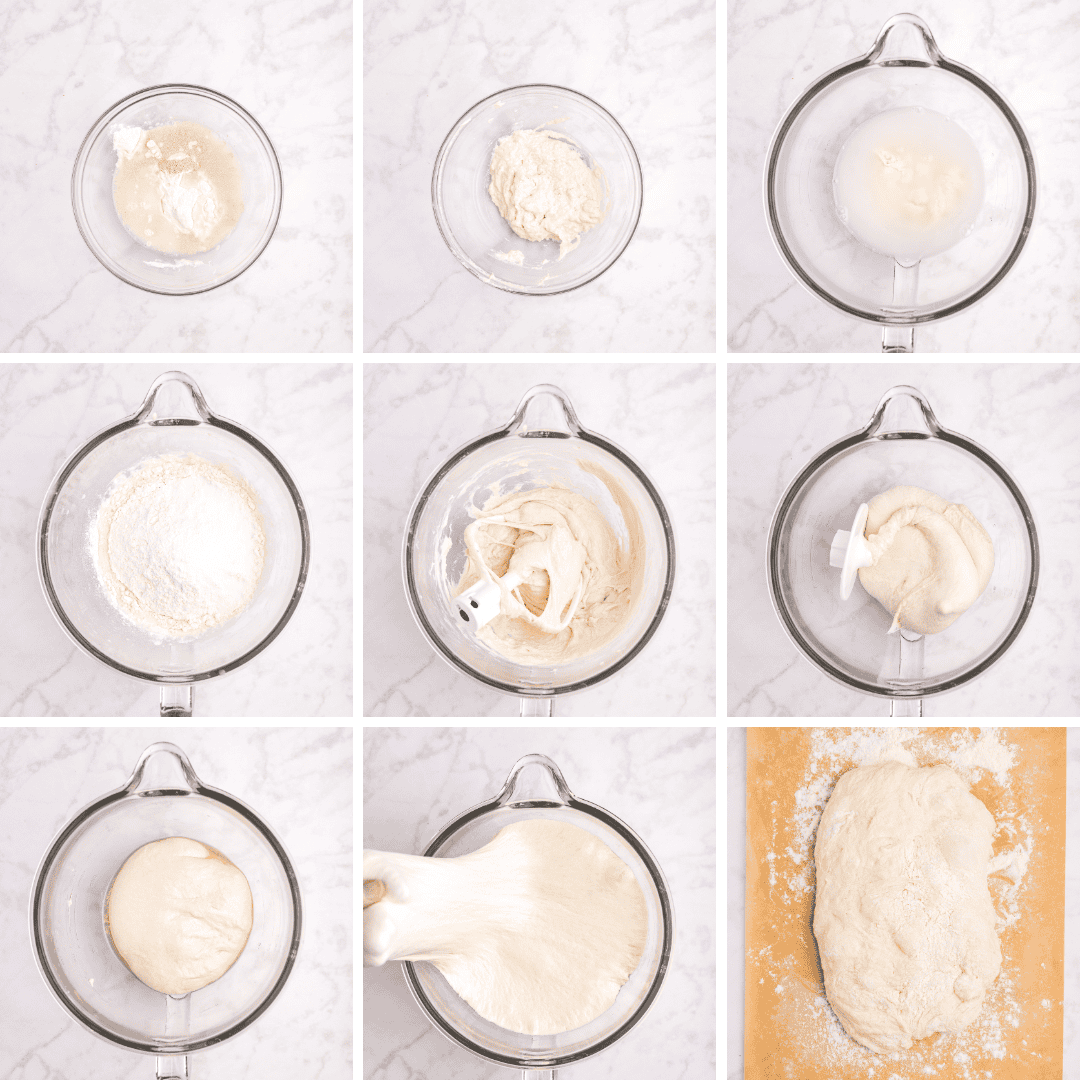
In a small bowl, add the all-purpose flour, yeast, and warm water. Using a whisk, stir to combine until there are no lumps visible. Cover and allow to sit on the counter at room temperature overnight or for 12 hours.
Make the Bread Dough
In the bowl of your stand mixer with the paddle attachment, add the sponge that was created the night before to one cup of warm water. Using a whisk, stir until fully combined. The mixture will look very cloudy.
Add the bread flour and salt to the bowl of the stand mixer. Turn the mixer to low speed and stir to fully incorporate the flour. Then increase the speed to medium and allow the mixer to work the dough for 6 minutes. (It will be very wet and sticky)
Scrape the ciabatta dough from the paddle and switch the paddle for the dough hook. Turn the mixer to medium speed and allow the machine to knead the dough for 8 minutes. At this point, you will see the dough pulling away from the sides of the bowl. The dough will become shiny and start holding its shape.
Grease a large bowl with about 1 tablespoon of olive oil and place the dough into the mixing bowl. Drizzle another tablespoon of olive oil on top of the dough and use your fingers or a brush to completely cover the surface of the dough with a thin layer of olive oil. Cover the dough with plastic wrap or a tea towel and let the dough rise for 4 hours.
Stretch and Fold
Once the dough has doubled in size, it’s time to follow the stretch and fold process. Wet your hands, take a small section of the dough from one side, and stretch the dough upwards, folding the dough over itself towards the center of the dough ball. (When doing this, just stretch and fold the dough over gently, trying to avoid popping all of the bubbles in your dough. It will result in a fluffier bread.)
Repeat this process, stretching and folding each side of the dough. Cover and set aside for 30 minutes.
Repeat this process 3 more times for 4 total stretch/fold/turn processes.
Bake the Bread
Once the last stretch and fold process has finished, let the dough rest for 30 minutes. While you wait, arrange 2 racks in your oven into the center and bottom. Place a baking sheet pan in the center and a cast iron skillet (or other oven-safe skillet) on the bottom rack and preheat to 425°F (218°C).
Place a piece of parchment paper about the size of your baking pan on the counter (to the side) and dust it with flour.
Put 1 cup of ice in a measuring cup and set aside.
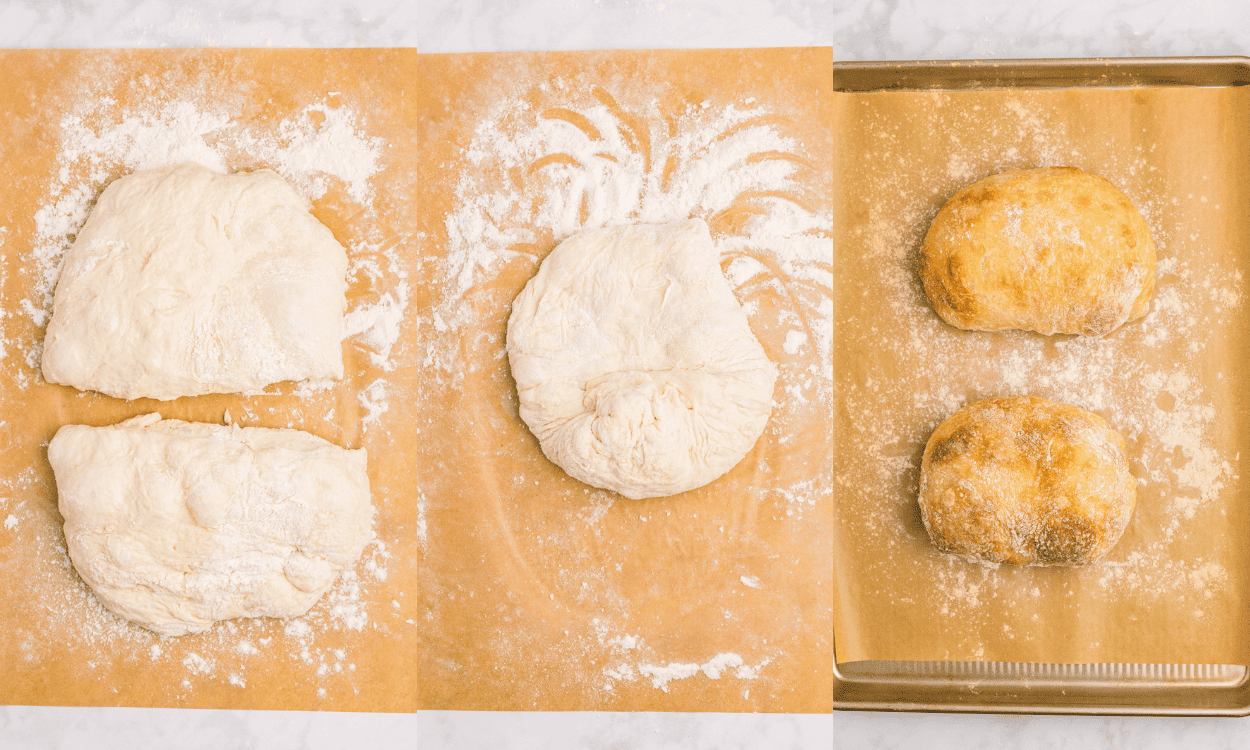
Sprinkle your counter with flour and turn out the dough onto your floured work surface. Cut the dough into 2 pieces for loaves or 12 pieces for buns. Dust the top of the dough with flour and place the dough pieces on the prepared piece of parchment paper.
Once the oven has come to temperature, remove the baking sheet from the oven, and place the piece of parchment paper with the dough on it onto the baking sheet. Place the baking sheet with the bread in the oven and 2 cups of ice in the cast iron skillet.
Bake at 425° F for 25 minutes or until the bread is golden brown. Let it cool before slicing, and enjoy!
Recipe Tips
- Make sure that your water is warm and not hot. Using water that is too hot will kill the yeast and result in bread that does not rise. You can aim for about 90°F (32°C).
- Wet your hands before stretching and folding your dough. This is a sticky dough, and wetting your hands will make it easier to work with.
- Make sure that you use enough olive oil to coat the entire ball of dough so it doesn’t dry out and form a crust while rising.
- Be conservative with the additional flour that you add to your counter. You can always add more if you need it, but too much flour can’t be easily taken out and can cause your bread to be dry.
FAQs
Do I need to add the cast iron skillet and the ice to the oven?
Yes, if at all possible, use a cast iron skillet. It conducts heat well and gets very hot in the oven. Adding the ice to the hot cast iron skillet will immediately create a plume of steam. The steam helps give rise to the bread while creating a traditional chewy crust on the outside of your bread.
How do I store my Ciabatta Bread?
If you have leftover ciabatta bread, you can store it either at room temperature or in the refrigerator. Either way, make sure to store the bread in a bread bag, with beeswax wraps or an airtight container to preserve freshness. Your bread will stay fresh for 1-2 days at room temperature or up to a week in the refrigerator.
Can I make this ahead of time and freeze it?
Yes! Make this ciabatta bread ahead of time and freeze it so you have fresh bread on hand whenever you want it. Make the bread as directed and allow it to cool completely. Wrap the bread in plastic wrap or foil and place it into a resealable freezer bag. Your bread will stay fresh for 3-4 months. Thaw before cutting.
What do I serve with my Ciabatta Bread?
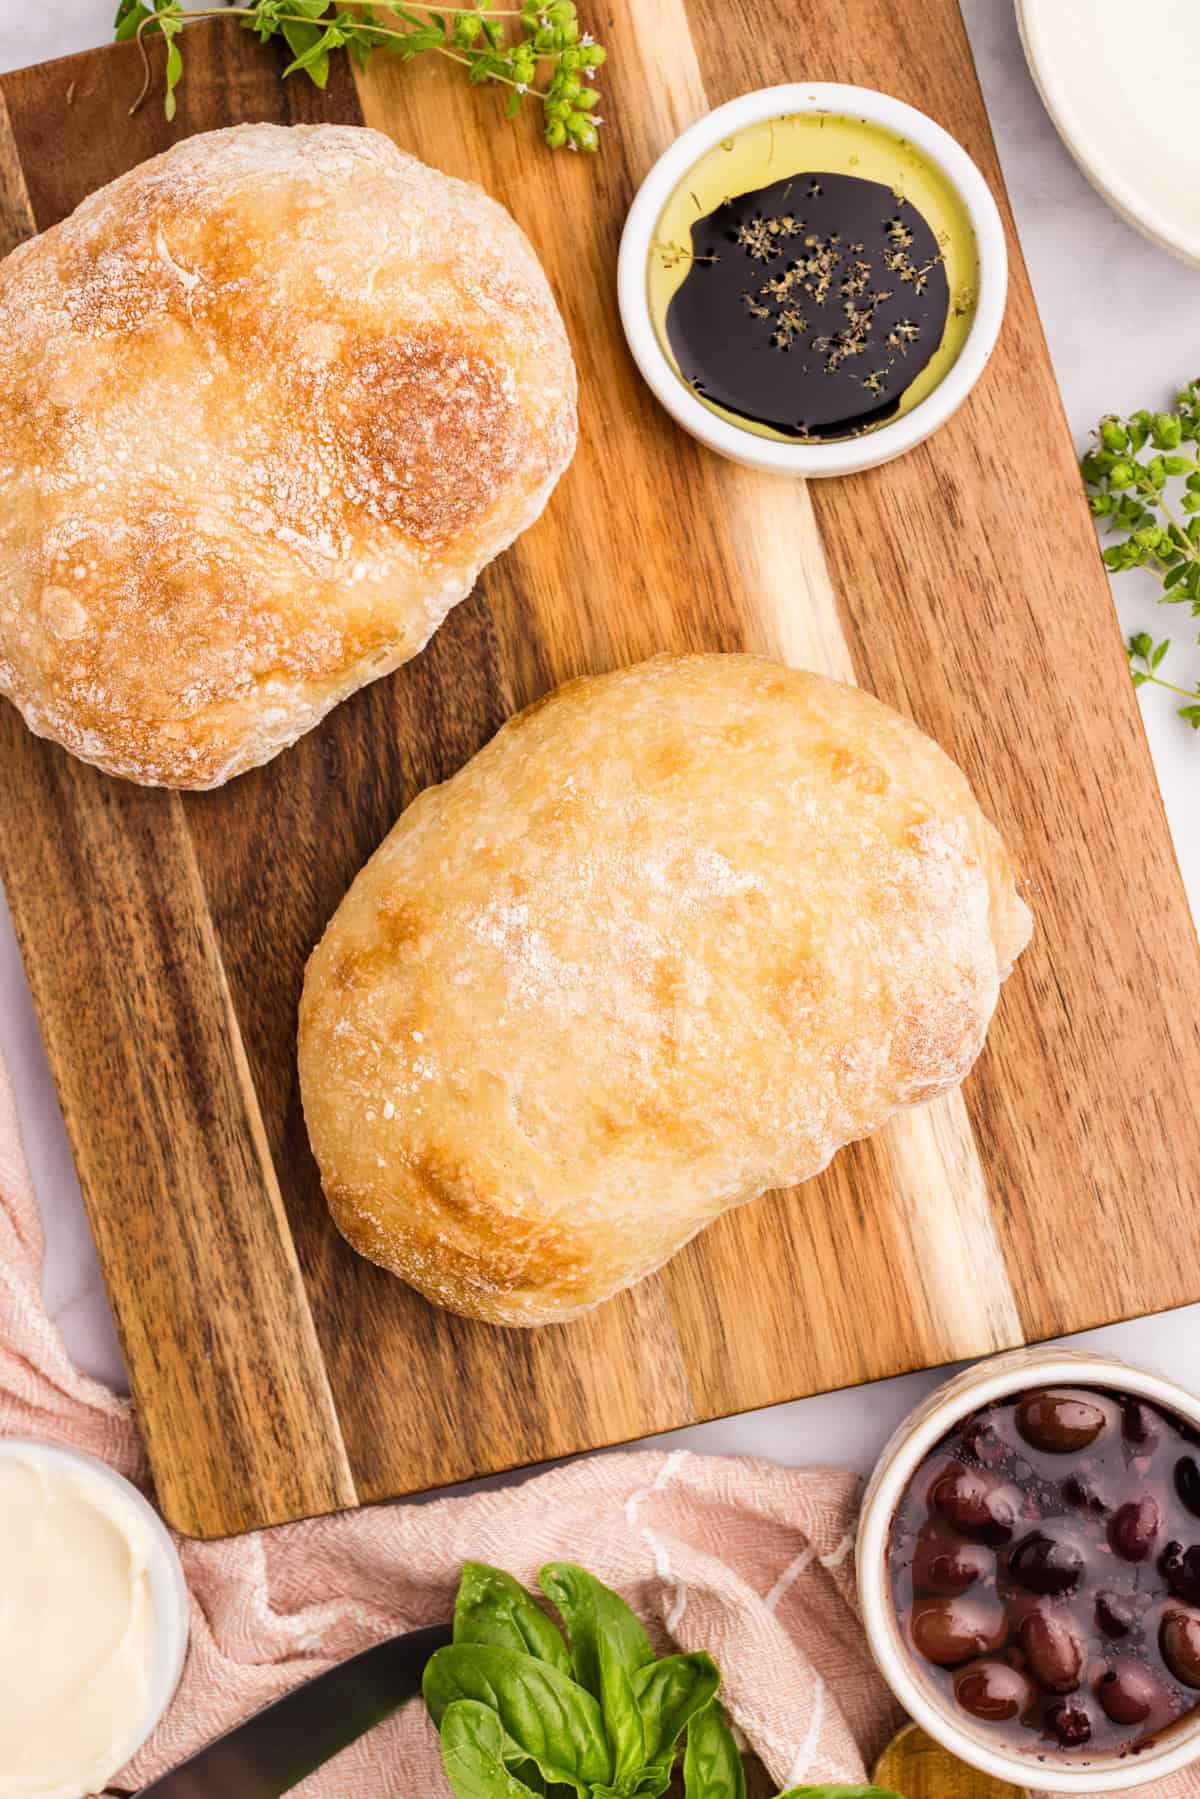
Ciabatta bread is the perfect side dish or snack to make you feel cozy and satisfied. Try it with one or any combination of the following serving ideas.
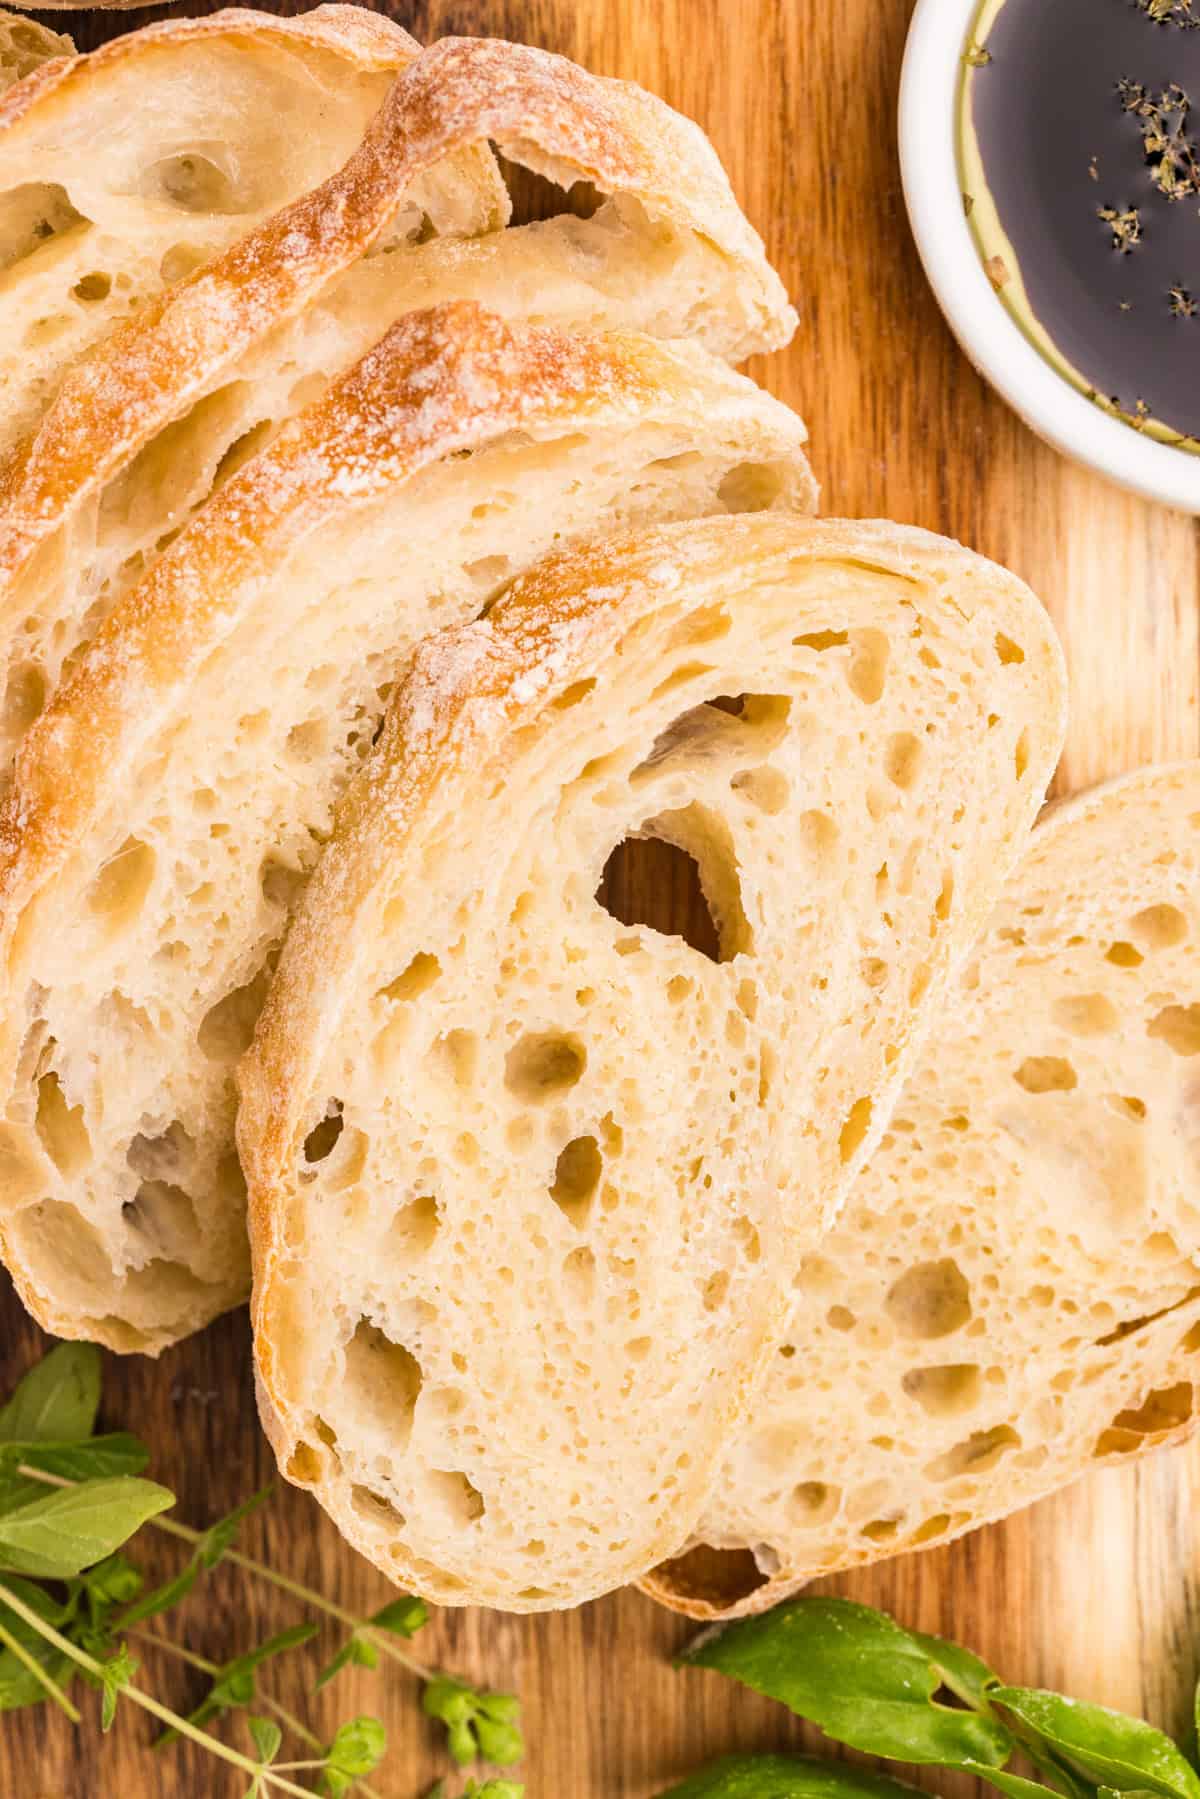
- Olive oil – Dunk this bread in olive oil with a bit of balsamic vinegar and sprinkle flaky salt for added crunch.
- Make a sandwich – This ciabatta bread is perfect for sandwiches. Enjoy with your favorite cold cuts and spreads.
- Garlic bread: Slice this bread and slather it with butter, minced garlic, and parmesan or mozzarella cheese for a slice of decadent garlic bread.
- With soup – Add this bread to the side of any soup, like this Stuffed Pepper Soup recipe or Turkey Soup, and soak up all the deliciousness.
What other variations can I make?
You can make this ciabatta bread into either 12 personal-sized buns or 2 loaves. You could also do both and make 6 buns and 1 loaf, giving you some versatility.
More Delicious Homemade Bread Recipes
Try one of these bread recipes next time you feel like baking:
- Pepperoni Bread
- Italian Bread
- Pineapple Bread
- Dutch Oven Bread
- Brown Butter Rum Banana Bread
- Coca Bread
- Cream Cheese Pumpkin Bread
Make sure you Pin or print this recipe so you can make homemade Ciabatta Bread anytime!

FOLLOW ME
FACEBOOK ~ PINTEREST
INSTAGRAM ~ TWITTER
YOUTUBE
Keep an eye out for more of my easy recipes each week!
Want to Save This Recipe?
Enter your email & I’ll send it to your inbox. Plus, get great new recipes from me every week!
By submitting this form, you consent to receive emails from 365 Days of Baking and More.
Ciabatta Bread Recipe
Ingredients
Sponge (Yeast Starter)
- ½ cup all-purpose flour
- ½ teaspoon active dry yeast
- ¼ cup warm water
Bread Dough
- 2 ½ cups bread flour
- 2 teaspoons sea salt
- 1 cup warm water
For Use in Shaping and Baking
- ½ cup all-purpose flour (or more if needed)
- 2 cups ice
- olive oil
Instructions
For the Sponge
- In a small bowl, add the all-purpose flour, yeast, and warm water. Using a whisk, stir to combine until there are no lumps visible. Cover and allow to sit on the counter at room temperature overnight or for 12 hours.
For the Bread
- In the bowl of your stand mixer with the paddle attachment, add the sponge that was created the night before and the warm water. Using a whisk, stir until fully combined. The mixture will look very cloudy.
- To the bowl of the stand mixer, add the bread flour and salt. Turn the mixer to low and stir to fully incorporate the flour. Increase the speed to medium and allow the mixer to work the dough for 6 minutes.
- Scrape the dough from the paddle and switch the paddle for the dough hook. Turn the mixer speed to medium and allow the machine to knead the dough for 8 minutes. At this point you will see the dough pulling away from the sides of the bowl. The dough will become shiny and start holding its shape.
- Grease a large mixing bowl with about 1 tablespoon of olive oil and place the dough into the mixing bowl. Drizzle another tablespoon of olive oil on top of the dough and use your fingers or a brush to completely cover the surface of the dough with a thin layer of olive oil. Cover the dough with plastic wrap or a tea towel and allow to rise for 4 hours.
Stretch and Fold
- Once the dough has doubled in size, it’s time to follow the stretch and fold process. **When doing this, just stretch and fold the dough over, try to avoid popping all of the bubbles in your dough, it will result in a fluffier bread. Wet your hands, take a small section of the dough from one side, and stretch the dough upwards, folding the dough over itself towards the center of the dough ball. Repeat this process stretching and folding all 4 “corners” of the dough. Cover and set aside for 30 minutes.
- Repeat this process 3 more times for 4 stretch, fold, and turn times.
Rest and Bake
- Once you've finished the last stretch and fold process, set the dough aside for 30 minutes. While you wait, arrange 2 racks in your oven into the center and bottom. Place a baking sheet in the center and a cast iron skillet on the bottom rack and preheat to 425°F (218°C).
- Place a piece of parchment paper about thesize of your baking sheet on the counter (to the side) and dust with flour. Place 1 cup of ice in a measuring cup and set aside.
- Sprinkle your clean kitchen counter with flour and turn out the dough onto your floured counter. Cut the dough into 2 pieces for loaves or 12 pieces for bun sizes. Dust the top of the dough with flour and place the dough pieces on the prepared piece of parchment paper.
- Once the oven has come to temperature, remove the baking sheet from the oven, and place the piece of parchment paper with the dough on it onto the baking sheet. Place the baking sheet with the bread in the oven and 2 cups of ice in the cast iron skillet.
- Bake at 425° F for 25 minutes or until the bread is golden brown.
Notes
- This dough is very wet and can be hard to handle. Make sure you wet your hands before working the dough.
- For best results, measure the ingredients with a digital scale.
- Store it either at room temperature or in the refrigerator. Either way, make sure to store the bread in a bread bag or an airtight container to preserve freshness. Your bread will stay fresh for 1-2 days at room temperature or up to a week in the refrigerator.
- This dough will make 2 loaves or 12 buns.

Leave A Reply!